A vent fan for your overlanding or camping vehicle - be it a van, a truck with a topper, or a large SUV - is a pretty reasonable luxury. While there's some cost and installation fabrication involved, a fan gives you airflow regardless of weather. Many fans even offer the ability to automatically maintain a specific temperature inside your vehicle (within the limits of simple ventilation, of course).
One of the best known vent fan manufacturers is MaxxFan , a popular company with RVs and campers alike. Here's some information about MaxxFan products that might be a good fit for vehicle owners, as well as some tips making sure that your ventilation fan doesn't kill your vehicle battery (Hint: The trick is to use an ArkPak to power the fan!).
Cooling for Campers
12VDC fans for campers and RVs are meant to ventilate enclosed spaces, cycle air to keep things fresh, and give vehicle occupants a mechanism for circulating air without leaving windows open (exposing the interior to rain, dust, etc.). Most of the MaxxFan 12VDC ventilation fans feature:
- A powerful 12VDC electric fan motor with a sealed ball bearing
- A 12 inch, 10 bladed fan that can move 900+ cubic feet of air per minute
- Twin lifting arms on the rain cover to prevent the lid from fluttering while you’re driving
- Easy to clean components
- The fan can run with the rain lid closed to circulate air, or open to bring in fresh air
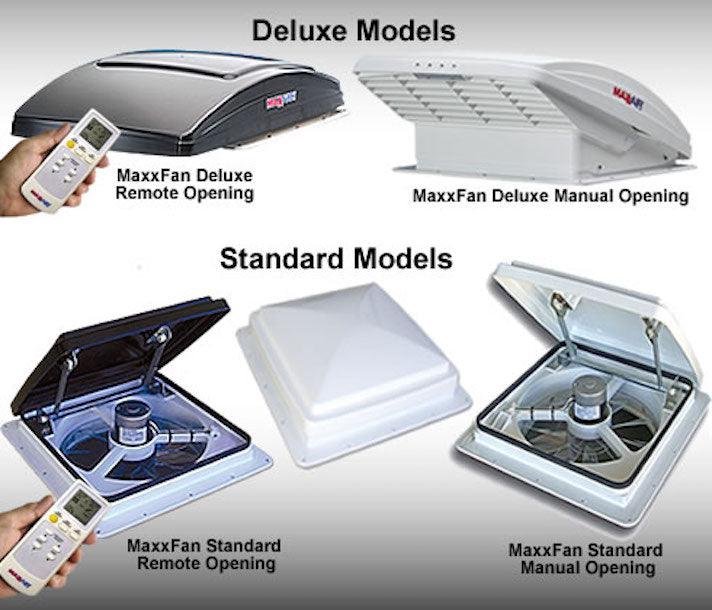
MaxxFan also offers some upgrades to their basic fan, which are summarized here:

Installation
As mentioned, the Maxxfan is meant to mount flush in a 14” x 14” hole, but it’s really important that you mount it so it’s totally waterproof. Here are some installation tips that will help you ensure a waterproof seal:
- Mark off your work area with blue tape to protect your paint
- Find the centerline and set the vent/fan in place to mark off the template (you can use tape or a marker)
- Put a drop cloth underneath the area to prevent a huge mess of debris from falling into your camper or vehicle
If you're cutting into a fiberglass topper:
- Using a cordless drill, drill out small holes all the way around the template
- Drill larger holes to fit the rotary tool in and use it to connect the dots
- Once you have your main fan hole, use your fingers to push back the paper structure to make room for fiberglass repair
- Mix fiberglass epoxy and apply to hole
- Sand fiberglass after 25 minutes
If you're cutting into a steel body panel:
- Make sure that your vehicle doesn't have any vital components (wiring, climate control ductwork, or structural steel) running thru the area you want to install the fan in. You should remove the headliner from your vehicle interior to see what's in the area where you want to install.
- Drill pilot holes in each corner, then cut from one corner to the next. Be sure to use a guide to ensure a straight cut.
- Test fit the ventilation fan (hinge forward!), make adjustments as needed, then clean up your cut with a metal file
- Replace the headliner, mark off the portion of the liner that will need to be cut away to accommodate the fan, and cut. It's always a good idea to take your time with measuring and to cut away less than you think you'll need...you can always cut more headliner away later.
- Verify all fitment one last time, drill mounting holes, then set the fan in place with adhesive sealant around perimeter and install mounting screws/bolts.
Within 48 hours or so, you’ll have a waterproof setup. Just make sure to keep it out of the rain until then!
Here’s a quick video showing more installation tips for rooftop vents: